Hi all,
It looks my search for a perfect extractor tool had not ended...
I've had a rightful remark that the “C” Ring was only used on the later "precious resin” MB pens.
On the earlier ones the lead spindle was secured with press fitted "cup ring', which is even more difficult to remove!
The extraction tool I've presented earlier works well to extract the “C” ring, but even then it looks somewhat borderline in the end....
The pulling stroke needed to get the “C” ring out of its seat groove is 1.3mm
The radial engagement notch on the top of the lead spindle, mating with the notch inside the top of the filling knob being also 1,3mm, I’ve experienced the lead spindle occasionally starts to rotate before the “C” ring jumps out of its seat groove.
This occurs when the radial notches just start slipping over each other, resulting in the fact the partly extracted “C” ring occasionally jumps back in its seat groove…….
I’ve also evaluated the difference in removing the lead spindel by torsion or purely by axial pulling.
This learned me purely pulling extraction creates much less spindle breakage risks compared to applying torsion.
Given the rightful suggestion to create a tool which can be used as well for the “C” ring and the “Cup ring”, and my experience that purely pulling is beneficial, I went back to the drawing board and designed a combined tool allowing both “C” ring and “cup ring extraction.
Extracting the “cup ring” out of its seat requires however a pulling stroke of 4.5mm, so the lead spindle would start to rotate after 1.2mm, as soon as the radial engagement of both radial notches is gone…..
After unsuccessfully trying different alternatives avoiding the spindle to rotate during extraction, I finally decided to make and install a threaded "left hand" brass “ 5BA die head” on top of the pulling shaft.
The female tool threads can be screwed - anti clockwise! - as far as possible over the broken lead spindle, providing a secure axial fixation.
This tool is however not as simple as the earlier presented version, but it works like a charm for both versions !
Took me 4 days, but I love these challenges, so I’m very happy.
Complementary benefit is that even short broken lead spindles - having a remaining thread length of 5- even 4 mm - can be extracted.
On “C” ring equipped pens were the remaining spindle thread length is below 4 mm the only alternative is trying to pull it out with a hook tool after drilling a 2.5mm hole through the remaining spindle part inside the knob so one can get underneath the "C" ring
On “Cup ring” equipped pens one can also drill a 2.5 mm through the remaining spindle part inside the knob so one can get underneath the cup ring to pull it out .
Note however the thickness of the cup base is only 0.3 mm, so pulling asymmetrical with a hook one can easily damage the cup base!
In both situations this works when the spindle threads are broken at the end of the threads, however if the remaining spindle part is longer this is not an easy task !
Another alternative is drilling cap a 1.0-1.5mm central bore through the cap top and knock the spindle and “cup ring" through … A black plug can be installed afterwards.
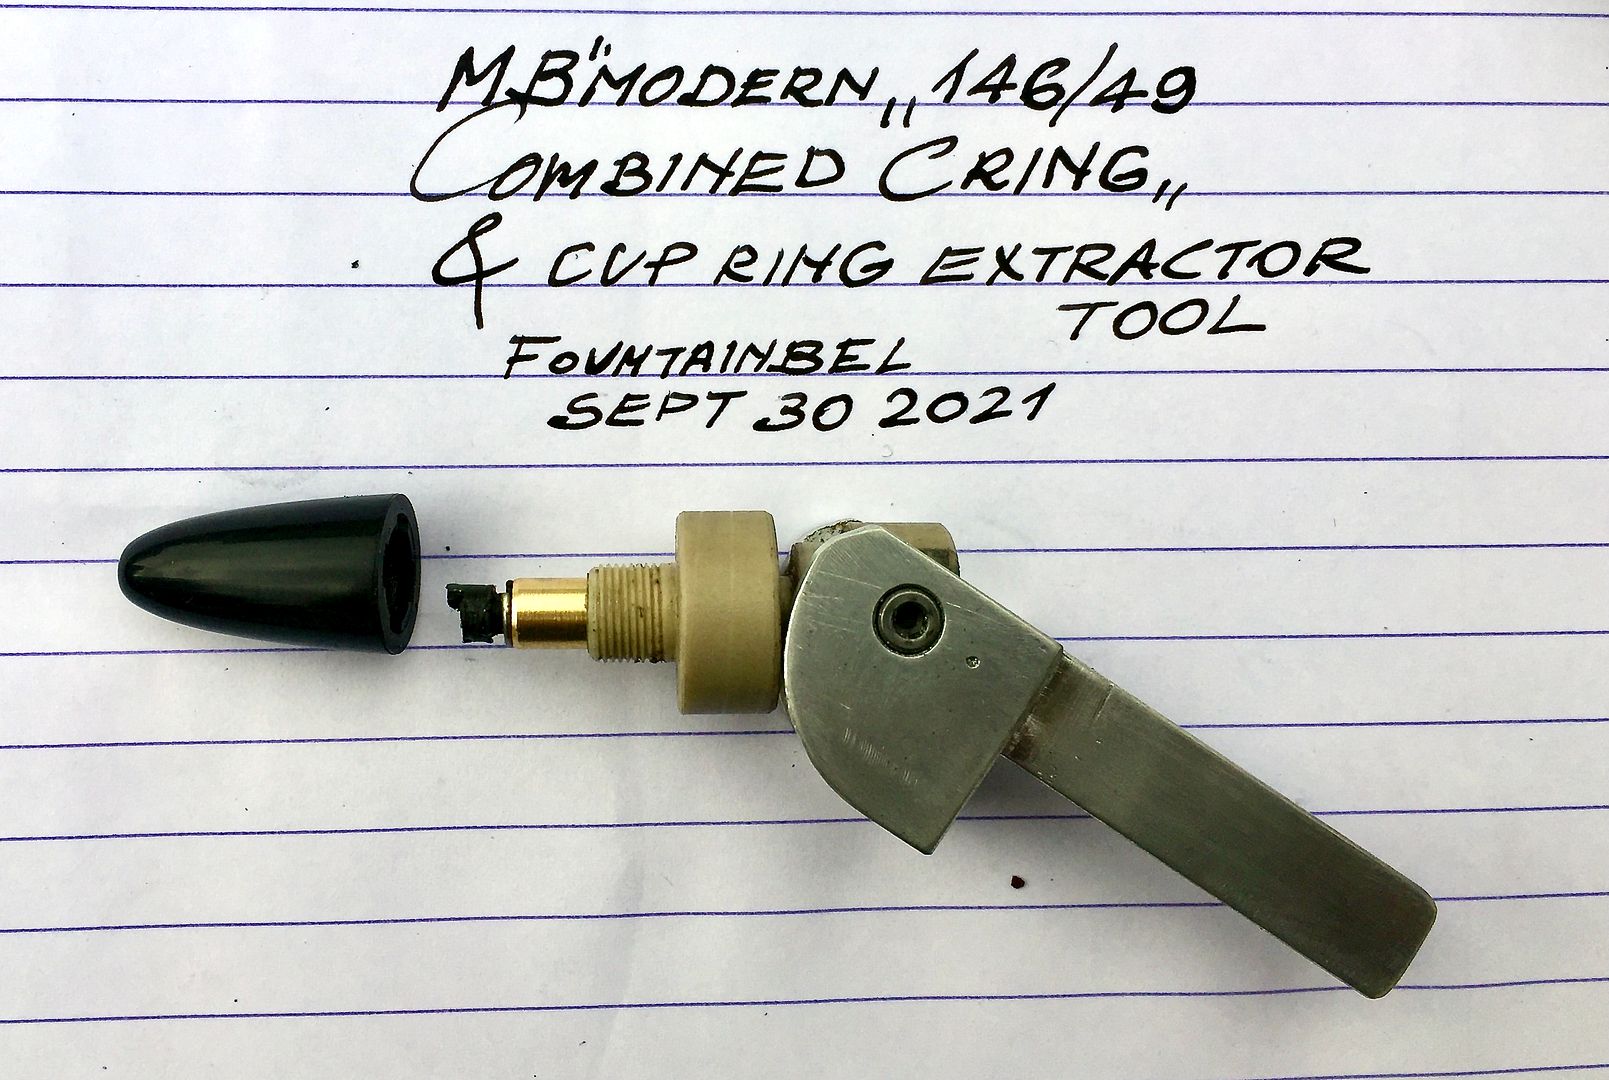
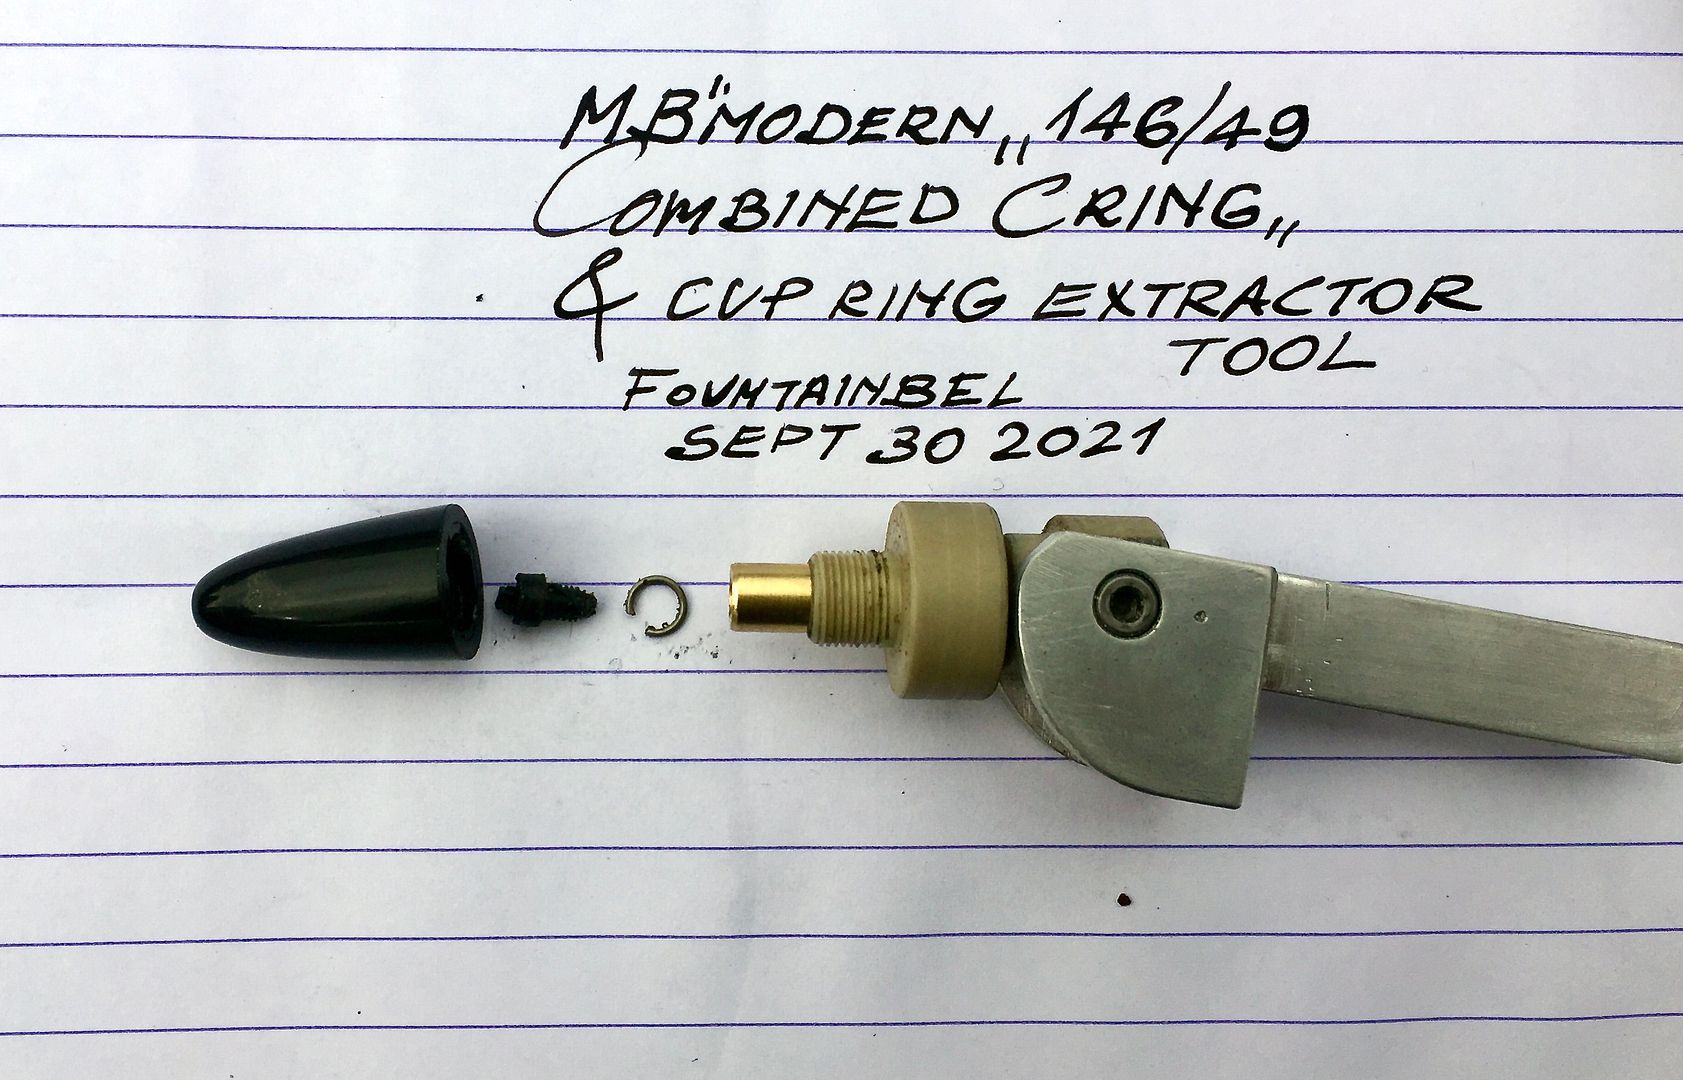
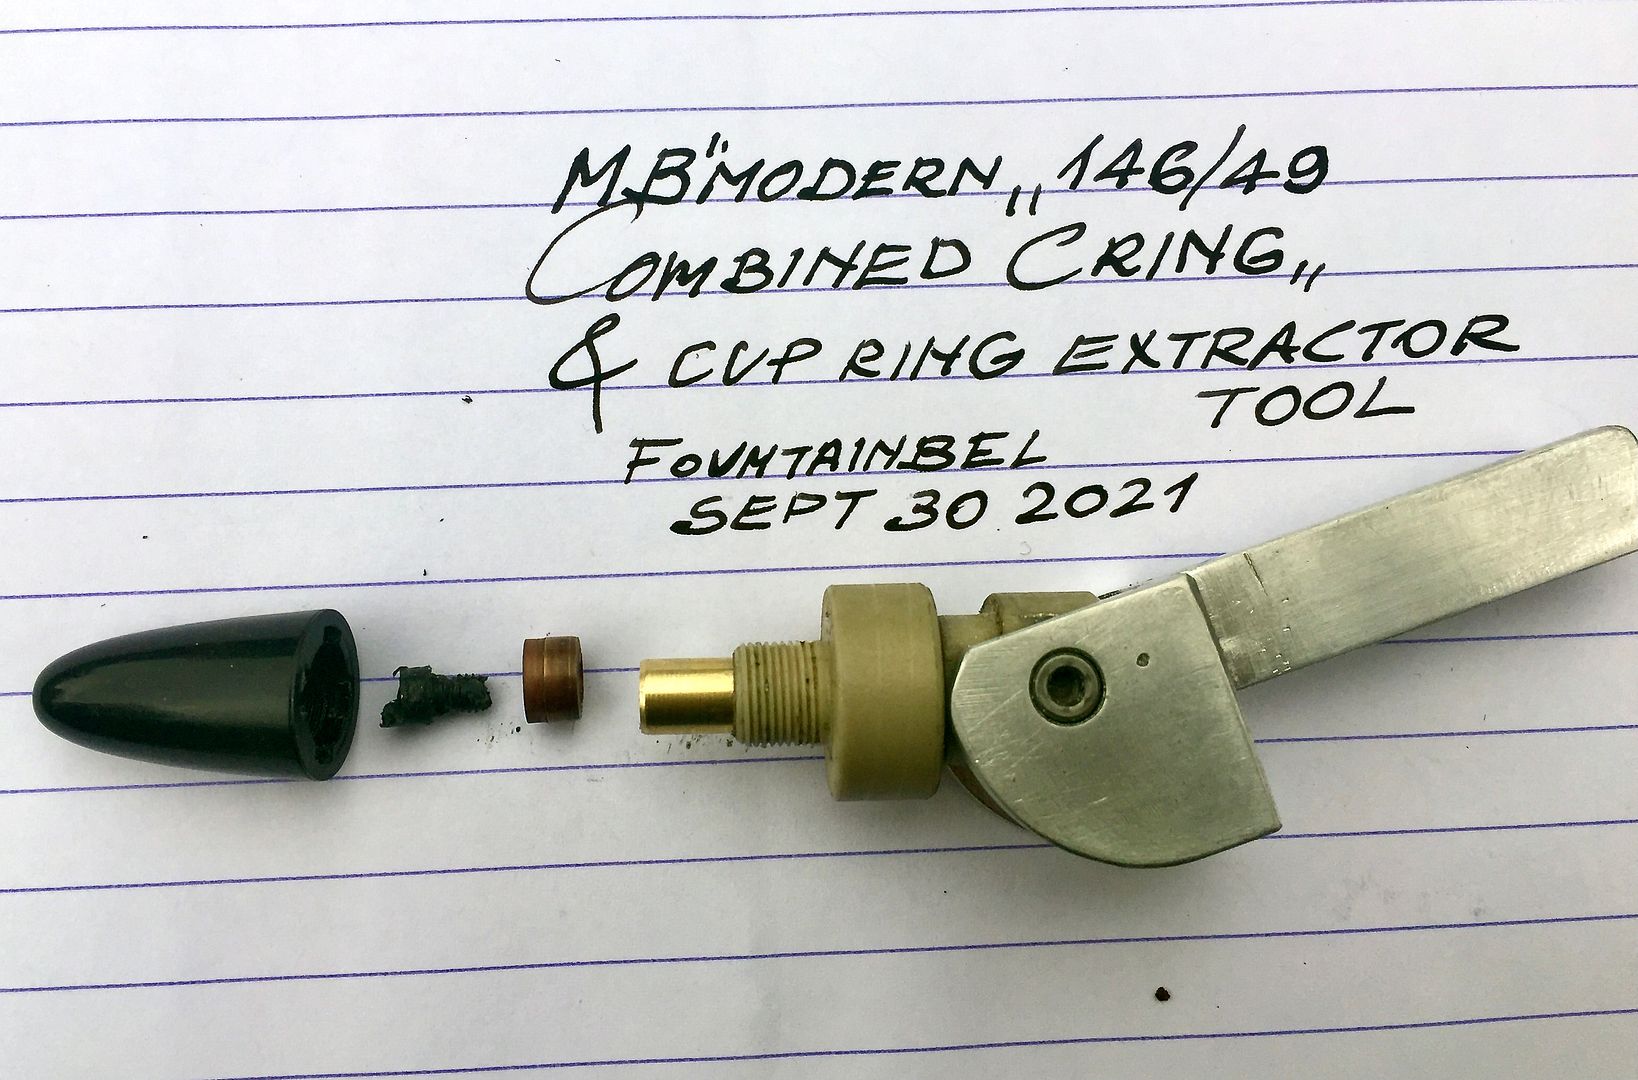
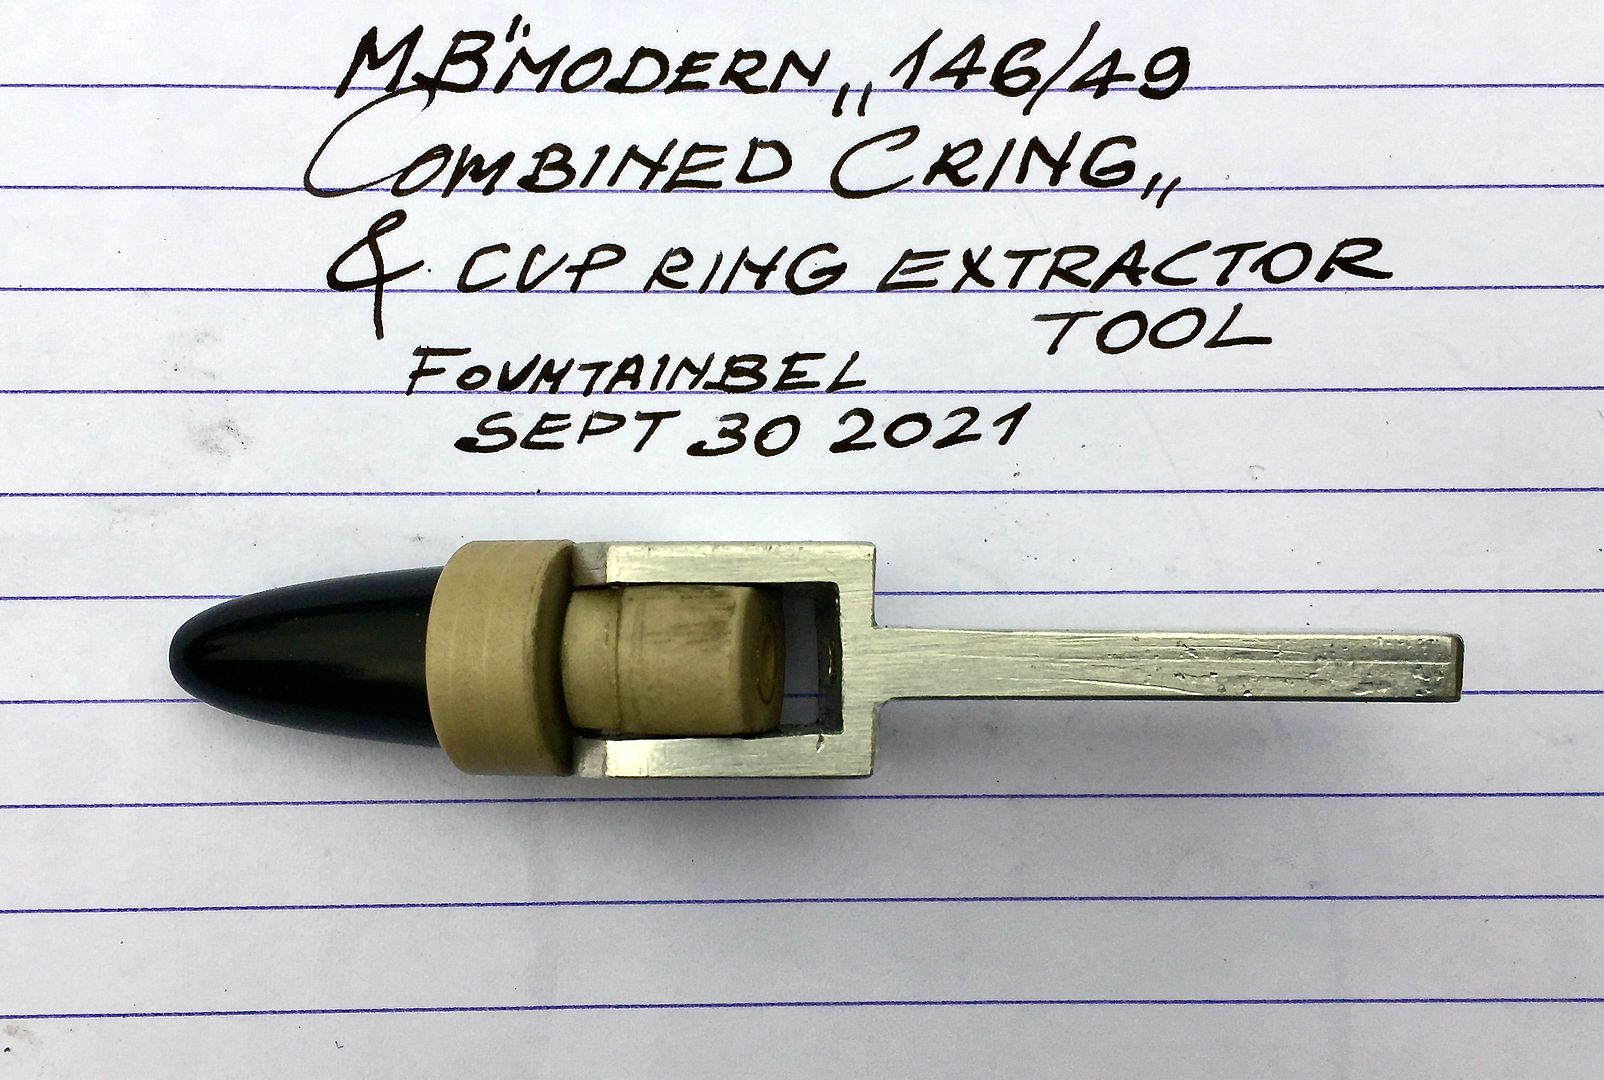
On the attached pictures you can see the tool used for pulling the “C”ring and the “Cup ring” out, on a broken spindle which has only 4.5mm thread left....
Note the tool uses an eccentric cam which backs-up against the base ring which is screwed in the filling knob, resulting in a purely axial pulling movement.
I strongly recommend to install the superior "Peek" lead spindle made by Custom pen parts in the UK. ( no affiliation just a very happy user !)
As always your comments, critique and thoughts are most welcome !
Francis


.JPG?width=1920&height=1080&fit=bounds)


